SOCIAL MEDIA

This Morning...

1.30.2009
Sliding

while getting ready for school Zoey told me that she wanted to go to the beach and could we be sure to get her some water shoes as soon as we see some at the store? Hmmm, I'm thinking it's it's going to probably be at least a couple more months for that idea to come to it's full fruitation.

Sliding

Luckily we have some awesome sliding hills in the backyard to take our minds off warm and sandy beaches for awhile...

Sliding

Have a happy weekend!

Creative Imaginations Layouts @ CHA

1.29.2009
Beauty

Getting to create projects for the trade shows for Creative Imaginations has been really fun, the only downside is that my projects, once sent away are no longer mine and I most likely won't get to see them again. I really loved the above layout that I did using the Mon Ami Collection by Christine Adolph and the Creative Imaginations' decorative brads. The picture is of my little sister and I thought that the whole layout came together pretty nicely...and I loved the quote that I found to use for it as well. It seemed timely for what it is that I imagine my little sister is going through and thinking about these last days that she has in high school. I remember that time being so discouraging at times, when I was trying to figure out who I was, where I fit in and whether or not it was even worth the hassle of trying to "fit in." Anyways, it was kind of hard to let this one go.

Instructions for Beauty Layout:

Supplies:
# 21461 Versailles Paper (reverse side)
# 21460 Friendship Bridge Paper (reverse side)
# 21463 Bell Raie Paper (reverse side)
# 21462 Fleur de Lys Paper
# 21465 Mon Ami Sticker
# 20568 Flower Brads Pink
# 18454 Lucky Apricot Alphabet
Misc: white cardstock, adhesive, 3 dimensional adhesive, glitter glue

Tools:
paper trimmer, scissors, circle cutting template, paper piercer, paper distressor

Instructions:
Cut your Friendship Bridge Paper to measure 4 x 12 inches and adhere it to the middle of your Versailles Paper. Cut a piece of the Bell Raie Paper to measure 4 ¼ inch x 6 ½ inches and using your paper distressor, rough up the edges. Mat your photo to the piece of Bell Raie Paper and adhere to your center strip of Versailles Paper 2 ¼ inches down from the top of your page. Add glitter clue to your Apricot Alphabet Letters and adhere letters above your photo. Above your letters adhere your Mon Ami bird Sticker using 3 dimensional adhesive. Print journaling on to white cardstock and cut into strips. Adhere journaling strips below photo on the strip of Versailles Paper. Create paper flowers using circle cutting template (cut three different sizes of circles using different sides of your Mon Ami papers and use distressor to rough up all edges, stack circles and using your paper piercer insert Flower Brads). Attach paper flowers (using brad) to your layout scattering them to the left and to the right of your Versailles strip of paper.

Here is another layout that I created for the show using the new Lego Collection by Creative Imaginations and while I was perusing the many photos that people have taken and shared online of CHA, I was super excited to see a bit of it in someones photo stream of pictures that they took from their time at CHA. While it's not one of my favorite's (like the one above) it is still so cool to see one of my layouts hanging there on the show board, kind of makes my not being there a bit more bearable!

Lego Style


Here is the photo stream that I found the show photo from (there's another one of mine in her photo stream that you can see a layout that has Ethan in it, but it's not as visible as this one).

Mom's Night Out!

1.28.2009
It was a blast! It was super nice to get out for an evening and spend some time with friends...not that my time with the Zoester is all that bad - it's great, it's just nice to have some "me time" once in awhile that actually is "me time." After yesterday's events (some of which involved my checking out some DVD's and leaving them on top of the car only to discover this fact upon seeing a flash out my rear view window and then followed by a large pick-up truck running over [I could only imagine this and than later deemed it to be indeed fact] aforementioned DVD's, a series of trips to and from the DVD rental store one of which I was almost in tears [not really, but close] and then another where I came bringing cupcakes for the amazingly kind-hearted man that runs and owns the rental store, and two trips to Wal-Mart due not to my coming to realize I needed to make an additional purchase but that someone had neglected to put some of my already purchased items in my bag [these items being the entire purpose of my trip in the first place]) I really needed a night out. Our evening consisted of dinner out at one of my favorite local restaurants and then some time was spent afterwards at my local scrapbook store (where I also am employed) where we created some Scrabble Tile Pendants with the help of my friend Misty (who makes jewelry and is an active member of MOPS). It was a super nice evening overall...here are some photos from the night:

Mops Night Out
My friend (and the teacher for the evening), Misty.

Mops Night Out
Here she is doing her teacher thing...

Mops Night Out
A group shot of some of us working on the pendants...(from left to right: Jacqueline, Mary, Paige, Misty, Kelly, Sarah, and the back of my friend Betsy's head - sorry Betsy!)

Mops Night Out
Another group shot...

Mops Night Out
There were several different steps to making the pendants...here some of us were glueing the papers to the pendants.

Mops Night Out
Here Mary was giving her pendant a coat of Modge Podge I think...

Mops Night Out
Betsy's trimming excess paper from her pendant here.

Mops Night Out

Tonight Zoey has Bible School (which I'm helping out with) and this afternoon we are playing a bit of catch up on things that just need getting done here around home. The sun is shining and after having an evening out I have a bit more spring in my step!

Looking Through...

1.27.2009
Papa & Baby Zoey

older photos last night. Here is one that I found of Ethan and Zoey...she was almost 4 months old I think at the time. I think you can tell why it is that one of her nickname's was Chubbles when she was little, look at those cheeks!

One of the great thing's about technology is that I was able to take my not so good photo (in the original you could hardly see Zoey's face as I was shooting the picture at dusk and into the light) and edit it using my computer's photo editing program so that I could indeed see my little one's face and discover that she was actually looking into the camera and at me! Amazing!

Today Zoey and I are going to spend some time baking some snacks for her day at school tomorrow (she's the snack leader). So far, we're thinking cupcakes, we'll see what transpires. Also hoping to get to the library at some point to return a video before the library police come looking for us (why is it that we can never seem to return anything on the exact day that it is due?). Tonight is Mom's Night Out for MOP's which means dinner out at my favorite restaurant and then some crafting at my local scrapbook store (which is where I work part-time). I can't wait!

Also thought I'd share this little card that I made using the Narratives Bloom Collection from Creative Imaginations...love that stuff!

Narratives Bloom Card

Supplies:
#20192 Floral Lilac Die-cut Paper
#20205 Bloom Epoxy Stickers
#18911 Sweet Pea Paper Ribbon

Instructions:
Cut Bazzill cardstock (kraft) to measure 11 3/4 x 3 1/2 inches and fold card in from the left at 5 1/ 4 inches. Adhere a piece of the (#20192) Bloom Floral Lilac pp (measuring 5 x 3 inches) to the front of the card and adhere your (#20205) Bloom Epoxy sticker to the front at this time too. Stick a piece of the (#18911) Sweet Pea Paper Ribbon on right edge (the portion of the card that shows from behind) and stitch through the center. Also, stitch a border around your (#20192) Bloom Lilac pp at this time. Adhere your smaller (#20205) Bloom Epoxy sticker on your (#18911) Paper Ribbon. Last, use a hole punch to punch two holes in the center of the front, right edge of your card and thread your ribbon through the holes and tie a bow.

It's Been Awhile...

1.26.2009
it seems since I've watched a really, really, really good movie but last night, Ethan and I watched a really, really, really good movie. The Visitor was one of those quiet movies that sneak up on you and totally entrap your heart. In my opinion, those are the best. The music in it is just amazing and was based on the music by a Nigerian musician, Fela Kuti. His music has been quite influential in the political community, making statements on human rights issues, etc. To check out the trailer, click here.


Hey There!

1.25.2009
You

Just a layout to share today. The floral paper is by Scenic Route and the other pattern is by American Crafts. Chipboard letters (which I love) are by Prima and the chipboard heart (which I painted and added glitter) is by Maya Road. Buttons are either from American Crafts, Doodlebug or just random ones from my stash. The twine that I used to tie my buttons is from the Creative Imaginations' Parts & Parcels Collection. They make my favorite twine for papercrafting as it's lightly coated with a waxy covering which makes tying and inserting the twine into little spaces a piece of cake!

You (journaling)

Zoey sang a song this morning along with her peers at the church that her Pre-School is affiliated with and she did a wonderful job, she makes me so proud. Really has been and continues to be such a blessing just to participate in all the little things that involve a little girl growing up. It's a beautiful but cold day here today, the sun is shining and all of us are at home nestled in for some good quality family time...thinking about making some Tapioca Pudding at some point with a little cinnamon sprinkled on top, mmmmmm!

Scrapbook Circle's "Will You Be Mine?" Kit for February

1.23.2009


There are lots of awesome pictures up now over at Scrapbook Circle of the February Kit, "Will You Be Mine?" Thought I'd take a moment and share a peek...doesn't it just make you want to get started on crafting some early special Valentines? To check out more photos of this awesome kit, check out our Scrapbook Circle blog here...the kit will be available for purchase by the first of the month so check back often and early! Hoping to get the chance to play with this myself this weekend so that I can share a little sweetness with you!

Cardmaker's Workshop Collection

A couple of things that I am really excited about this weeks release at CHA for Creative Imaginations is the new Cardmaker's Workshop Collection by Jenn Mason. It's a pretty new concept that's designed for the masses...those people that want to create uniquely assembled and crafted cards but on perhaps less time and for, well, the masses (these cards come in multiples, many different colors and are even reversible!). To learn more about this awesome collection and when it will be released, check out the Creative Imaginations site here.

Another release that I am super excited about is Karen Russell's Narratives line. While I am bummed to hear that this will be her last release for awhile, I am super stoked that this release will include the fun camera negative strips that were released quite some time ago, but now will be available in different styles and colors! To get a peek at those and more of her release, check out her blog here. Looking forward to creating some fun layouts using those for sure!


On to other things, I'm pretty stoked to have been recently asked by another area library here to provide an introductory workshop on scrapbooking. I've booked a date with them for the early Spring of this year and am really looking forward to it and am already gathering ideas on what I will compile for the workshop. Nothing beats the opportunity to share a bit about this craft and what it can offer so many diverse individuals. If you have any ideas on what information I should be sure to include and share, please leave them here in my comments, they would be greatly appreciated!

Also am a pretty happy camper today as I received my February Kit from Scrapbook Circle in the mail! This one is a favorite (I'm pretty sure I say that every time) but this time I mean it even more, if that's possible! Of course it's got lots of reds and pinks with that certain special February holiday in mind...think Making Memories, Love Notes and Fancy Pants, Splendid and then throw in lots of other fun little bits and pieces (including some Jenni Bowlin perhaps?) and you've got one seriously awesome kit...I can't wait to share my creations using this kit with you!

Pop Up Pancakes

1.22.2009
I've made Pop Up Pancakes before, only I called them Puffy Pancakes and made them in a casserole dish, sometimes adding slices of apples and brown sugar to the mix. When I saw that this site had the recipe and baked them and had the idea to put them in muffin tins I had to try it out for myself. And being that the prompt for this week's Inspire Me Thursday project was "breakfast" I knew that this was the week I would be trying it. Turns out that this morning was the morning...here they are (albeit a bit deflated once out of the oven still in the pan).

Puffy Panckes in the Pan

And here they are on our very own (and very fashionable handmade dinosaur plate) with some powdered sugar and maple syrup.

Puffy Pancakes

Check out the recipe here if you so desire.

Little Treasures

1.21.2009


I recently discovered Liz Lamoreux's Etsy shop...my favorite pendant of hers is the one above and it's a really good mantra I think to have. Right now her apron's are on sale as well. I absolutely adore this task apron and the patchwork design of it, it reminds me of my grandmother's quilting a bit.


These Wobbly Plates make me smile from Brigitte Bouquet's Etsy Shop, and they come in many shapes and sizes as well as many different colors.


Rebecca Sower's Hodge Podge Dictionary Journal is just lovely...but then again, I love all of her creations.

This prayer (below) written by George Macdonald I consider to be a treasure (from the book, The Diary of an Old Soul). A framed print of this prayer was given to Ethan and I after we married and it hangs in our bathroom. I find that I look at it and read it every morning without even really making a point to. I love the broken-ness of the text and how it forces me to think and re-think about what it is that is being said. After researching it a bit more this morning online, I discovered that this prayer is an excerpt taken from the month of January in the book (the book is sectioned into months of the year). I am adding the book to my list of books to purchase.

Sometimes, hard-trying, it seems I cannot pray--For doubt, and pain, and anger, and all strife.Yet some poor half-fledged prayer-bird from the nestMay fall, flit, fly, perch--crouch in the bowery breastOf the large, nation-healing tree of life;--Moveless there sit through all the burning day,And on my heart at night a fresh leaf cooling lay.

Another treasure recently discovered is the artist Andy Goldsworthy. An environmental sculptor and naturalist who utilzes his natural surroundings to create his artform. I was so excited to share my discovery with my dad and he shared with me that he actually had gotten the chance to meet Andy several years back. I thought this excerpt from his documentary was pretty special:

52Q & Sharing Some Music Links

1.19.2009
52Q - Week 1

The first prompt for Emily Falconbridge's year of 52 Questions was wishes for the new year...above is the front of my tag and below is what is on the back.
52Q - Week 1 (back)

The following week's prompt (I'm playing a bit of catch up) was change: what are you afraid of? Here is my completed tag for that prompt:

52Q - Week 2

And just for fun, here is a bit of what I've been listening to here lately:


Get a playlist!
Standalone player
Get Ringtones

Altered Bare Elements Danelle Box with 12 Books

1.18.2009
Danelle Box w/12 Books using Felicity

This past week I've been busy preparing projects for the Craft and Hobby Association Winter Trade Show that is January 25-28th in Anaheim, California. It's a time and place where all scrapbooking, papercrafting, rubber-stamping and other crafty companies gather together to show their new products that are coming out to retailers and designers alike in hopes of obtaining orders and to drum up interest in general for their products. I am honored to be one of the designers for Creative Imaginations that is creating projects with their products for displaying in their booth this year. Last year was my first time working with Creative Imaginations and it was a bit overwhelming, but I got what I needed to get done and learned a ton about what it is that I could do better and how to better simplify things for myself when preparing for future shows. This time around has gone by very smoothly. I think I just have three more project instructions to write and to send over to the art department over at Creative Imaginations and I'll be done. All my projects were sent in last week...I can't tell you how good that feels! Anyways, just getting the chance to beathe a bit here has been nice and got me thinking about projects that I did for last year's show and I realized that I haven't shared a lot of them here and thought it would be fun to take the time to do so now.

The above is the altered Bare Elements Danelle Box with 12 Books that I used the Felicity Collection of patterened papers and embellishments on by Christine Adolph. It was one of my favorite projects that I did from last years show.

Supplies:
#16315 Bare Elements Danelle Box w/12 Books
# 20046 Cherry Blossom Foil Paper
# 20047 Felicity Music Foil Paper
# 20049 Wedding Paper Foil Paper
# 20050 Felicity Grid Foil Paper
# 20051 Felicity Scroll Paper# 20054 Felicity 12 x 12 Cardstock Sticker Sheet
# 20056 Felicity Epoxy Stickers# 20057 Felicity 12 x 12 Chipboard Sheet

No School Today...

1.15.2009
for Ethan (Zoey only goes M-W-F), due to freezing, cold temperatures. Having Papa home during a weekday always makes for a different schedule of events around here. A bit lazier of a morning being one.

Around mid-morning Zoey and I managed to take off for a play date with friends which turned into a late morning playtime, nice lunch and early afternoon playtime with friends. It was really nice to get out and to have Zoey get to play with little buddies (friends that she doesn't see normally when school isn't cancelled, as one goes to school opposite days as her normally) and it was also nice for me to get some good conversation time in with a special friend.

Hoping things warm up sooner than later, forecast isn't that great though for tomorrow it seems...

Here is a recent layout that I did just using scraps of bits and things that were in and around my desk. Photo was taken of my dad when I was in about 6th grade I think, that would make it about 18 years old. That just doesn't seem possible.

Remember

And just one more share, (I had to...I can't help but be proud), this is actually the first ever double-layer cake that I have ever made. I am 31 years old (I think?) and just this year I braved double-layer cakes! I think I had an unnatural fear of my cakes not coming out of the pans completely, but I am thrilled to report they did!

Cake

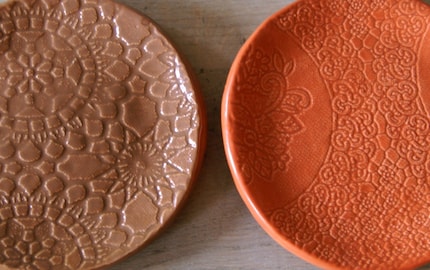
I was thinking about my Grandmother the whole time I was baking it (she used to make elaborate wedding cakes) and so it only seemed fitting that I put the cake on one of the beautiful plates that she has given to me over the years. Here is the recipe for this little beauty:

"PERFECTLY CHOCOLATE" Chocolate Cake

Ingredients:
2 cups sugar
1-3/4 cups all-purpose flour
3/4 cup HERSHEY'S Cocoa
1-1/2 teaspoons baking powder
1-1/2 teaspoons baking soda
1 teaspoon salt
2 eggs
1 cup milk
1/2 cup vegetable oil
2 teaspoons vanilla extract
1 cup boiling water

Directions:
1. Heat oven to 350°F. Grease and flour two 9-inch round baking pans.

2. Stir together sugar, flour, cocoa, baking powder, baking soda and salt in large bowl. Add eggs, milk, oil and vanilla; beat on medium speed of mixer 2 minutes. Stir in boiling water (batter will be thin). Pour batter into prepared pans.

3. Bake 30 to 35 minutes or until wooden pick inserted in center comes out clean. Cool 10 minutes; remove from pans to wire racks. Cool completely. Frost with "PERFECTLY CHOCOLATE" CHOCOLATE FROSTING. 10 to 12 servings.

"PERFECTLY CHOCOLATE" CHOCOLATE FROSTING

1/2 cup (1 stick) butter or margarine
2/3 cup HERSHEY'S Cocoa
3 cups powdered sugar
1/3 cup milk
1 teaspoon vanilla extract

Melt butter. Stir in cocoa. Alternately add powdered sugar and milk, beating to spreading consistency. Add small amount additional milk, if needed. Stir in vanilla. Yields about 2 cups frosting.

Decorative Folding Card

1.14.2009
Accordian Mini in a Box

I found this wonderful little project complete with a tutorial posted on Katy Myhre's blog. I thought that it would be a fun card to give away to a a friend with photos included on the inside blank pages or even little tea packets like the one that Katy posted on her blog.

Accordian Mini in a Box

I made a few tiny little changes to the design and am really happy with how it turned out. Thanks for the inspiration Katy!

Accordian Mini in a Box

Just Popping On to Share (Awesome Chance to Win Some CI Product!)...

1.11.2009
cicreativecafe 029

Pocket Clipboard Created using all Creative Cafe products by Creative Imaginations.

There are some fun things going on over at the Creative Imaginations blog! Stop on over for some fun artist interviews (yesterday's post was on one of my favorite CI artists, Christine Adolph and she shares a bit about her creative process when it comes to designing her papers and product line). Today's post is a pretty awesome one if you like the Creative Imagination's product line of Creative Cafe products...if you leave a comment sharing whether or not you feel that you are making more handmade gifts these days and then if you share whether or not you would be interested in project kits (at varying cost levels) you'll be entered for a chance to win $100 worth (retail cost) of CI product! Refer a friend and you will be entered more than once! Talk about a win/win situation! Get on over there!

Bringing a Smile to My Face

1.09.2009
Getting my hands on new (at least to me) books always seems to add a little skip to my step and yes, a smile to my face. There is something so exciting about the prospect of what is inside those crisp, new book covers and when those books are crafty books, let's just say the excitement is even all the more! At least that is the case for me!

Yesterday Zoey and I spent the afternoon at the library. We always seem to make a haul each trip and this visit I was doubly excited because I knew that I had some books in that I had requested from outside our local library system (gotta love this resource!). Here is some of what is keeping me busy...and I think it is safe to say that I am venturing outside of my paper only idea of craftiness! I am contemplating the thought anyways...


Little Stitches for Little Ones by Amy Butler

I absolutely LOVE Amy Butler's fabric designs and her projects are right up there as well. Illustrations in this book are simply stunning and patterns are included within the book. Very nice.


Sew & Stow by Betty Oppenheimer

This book has so many amazing projects in it that I totally think I can actually make. I also am extremely impressed with the authors instructions and explanations when it comes to techniques for sewing. She includes step by step instructions for basic stitching and more complex stitching (simple, straight lock stitch, machine stitch, hand stitching, stitching around corners, back stitching, slip stitch, top stitching, box stitching and more). Tons of information on seams, stitching around corners (something that has terrified me before reading this book!), mitering corners, gathers, pleats and more. I think the reason that I am so excited about this book is that it is the first time that I've read a book on sewing and after reading the instructions and viewing the photos, I actually have the thought that it is possible that I could do this! Seriously am excited about this book...if I think I can miter corners after reading just a page or two, than just think what is possible after reading the entire book! This is a book that I am thinking will be added to my list of "books to purchase" as it would be a great reference tool as well as a wonderful project guide. Just one more thing that I love about the book is that the author leaves the creative design up to the reader...and she does this on purpose. Something that I fully appreciate!


Junk Beautiful by Sue Whitney and KI Nassauer

I picked up this one just for the sheer fact that I love old stuff and I love "junking" and it's always a treat to get a new twist on what someone has done with something old that was found.


Sophie's Masterpiece - A Spider's Tale by Eileene Spinelli

And lastly, I have to share a gem that Zoey and I discovered while selecting books in the children's section. I love it when we bring home a big stack and are pleasantly surprised with one story that's just a tad bit more magical than the others. The story of Sophie (an artist of many talents) is so touching and magical I can hardly share more in fear that I would not give the book justice. It leaves the reader just a bit wistful and with a heart that is longing. I love that the author was inspired to write this book due to a real-life experience that she had when she was young and living in a boarding house (Sophie the spider lives in a boarding house as well). Here is the publisher's excerpt taken from the jacket of the book:

Sophie's no ordinary house spider. She's an artist; and every web she spins is more wondrous than the one before. But don't mention that to the guests at Beekman's Boardinghouse, because they don't like spiders. No one there wants anything to do with Sophie or her magnificent creations - no one except the woman on the third floor. She's a new mother "weaving" something herself; and when she runs out of yarn, Sophie knows the time has come to create the masterpiece of a lifetime.

Happy reading everyone! I know that it will be the perfect weekend for that here...cooooooold!

Creative Imaginations Share...

1.08.2009
Madeline BE Album w/Mon Ami Collection

Here are some pictures of a clear album by Creative Imaginations that I altered using the Mon Ami Collection of patterned papers by Christine Adolph. This will be a class that I will teach later this month at my local scrapbook store.

Madeline BE Album w/Mon Ami Collection

Supply List:


Madeline BE Acetate Album
Mon Ami Gold Foil Cardstock by Christine Adolph
Mon Ami Friendship Bridge Double Sided Cardstock by Christine Adolph
Mon Ami Bell Raie Double Sided Cardstock by Christine Adolph
Misc: cardstock, ribbon, trims, and staples

Photo Wallet Brag Book

1.07.2009
Wallet Book

This is a fun and pretty easy little project and would make for a perfect little brag book of photos of the kids to throw in your purse or to give away to a grandparent to do the same with pictures of grandkids enclosed! I used the patterned papers and the epoxy stickers from the January Kit for this version and was really happy with how it turned out...seems like I'm really into the blue and red color combo lately!

Here are some measurements and simple assembly instructions for this project, be sure to share your finished project if you choose to create one of these yourself as I'd love to see it!

Wallet Book

Supplies:

paper trimmer with scoring blade
scissors (to trim mat behind epoxy sticker)
adhesive
cardstock:
outside (I chose kraft) measuring 4 inches x 11 inches, score at 1 3/4 inches, 2 inches, 5 inches and 8 inches
3 inside panels (I chose red) measuring 7 1/2 inches x 2 3/4 inches, score in half at 3 3/4 inches
belly band (I chose kraft and covered w/a strip of pp) measuring 8 inches x 1 inch
3 journaling blocks (I used patterned papers from the Jan Kit for these) measuring 3 1/2 inches x 2 1/2 inches
Miscellaneous: I cut additional patterned papers and added some buttons and twine for embellishing the rest of my book once assembled.

Instructions:

Adhere inside panels, alternating directions when assembling. Adhere your inside journaling blocks. Fold up wallet using your score lines. Fold belly band around wallet and glue. Decorate as desired!


Wallet Book